
Table of Contents
- Why Pool Tiles Come Loose and How to Diagnose the Cause
- How to Reattach Pool Tiles Without Draining the Pool
- Pool Tile Grout Repair: Sealing the Grout Line for Good
- Choosing the Right Adhesive and Grout for a Lasting Bond
- Pool Tile Replacement: When a Small Repair Is Not Enough
- Cost to Replace Pool Tiles and When to Call a Professional
- Cure Times, Return-to-Service, and Preventing Future Tile Damage
- Conclusion: Getting the Best Results from Your Pool Tile Repair
- Frequently Asked Questions
Last Updated: October 12, 2026
Why Pool Tiles Come Loose and How to Diagnose the Cause
A loose waterline tile almost never fails on its own. It usually signals that water got behind the tile, the bond broke down, or the substrate shifted.
Here’s the part most guides skip: fixing the tile without fixing the cause means you’ll be back at it next season. So before you grab a tube of adhesive, figure out why the tile let go.
Common Causes of Bond Failure at the Waterline
Bond failure is the loss of grip between the tile, the thinset, and the pool surface. At the waterline, that bond takes a beating.
- Water chemistry swings. Low calcium or high acidity eats at grout and adhesive over time.
- Freeze-thaw cycles. Water seeps into a grout line, freezes, and pushes the tile off.
- Poor surface preparation. Dust, algae, or old adhesive left on the substrate kills new bond.
The Pool & Hot Tub Alliance water chemistry guidance notes that unbalanced water is one of the most common drivers of surface and tile damage. Test your water before you repair anything.
Skipping the chemistry check is the number one reason repairs fail. If your pH or calcium hardness is off, new tile and grout will fail just like the old ones did.
Assessing Damage: Cracked, Loose, or Missing Tiles
Not every problem needs the same fix. Tap each tile with a screwdriver handle and listen.
- Solid ring: the tile is bonded. Leave it.
- Hollow thud: the bond is failing. Plan to reattach it.
- Cracked or missing: remove and replace.
Check the grout line too. Hairline cracks are cosmetic. Deep cracks that let water through need full grout repair. If more than a handful of tiles are loose, a small repair may not be enough.
How to Reattach Pool Tiles Without Draining the Pool
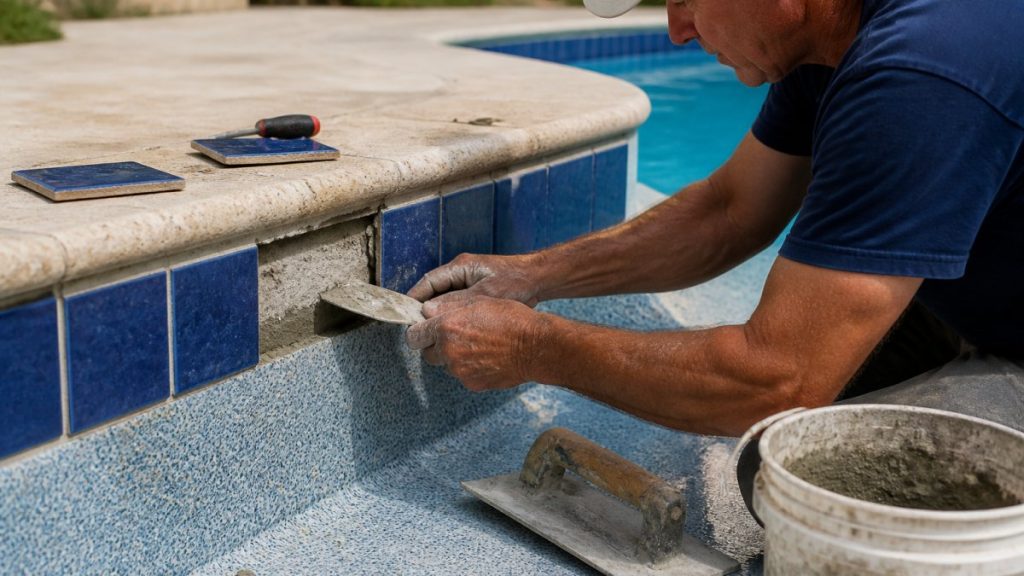
You can reattach waterline tiles without draining the pool. Lower the water level just below the repair area, work in small sections, and use a pool-rated adhesive that cures underwater.
This is the method we’d use for one or two tiles. For a larger area, draining makes the job cleaner and the bond stronger.
Tools and Materials You Will Need
Gather everything before you start. You don’t want to stop mid-repair with wet adhesive on your hands.
- Replacement tile that matches your waterline
- Pool-rated thinset or waterproof tile adhesive
- Epoxy grout or waterproof grout
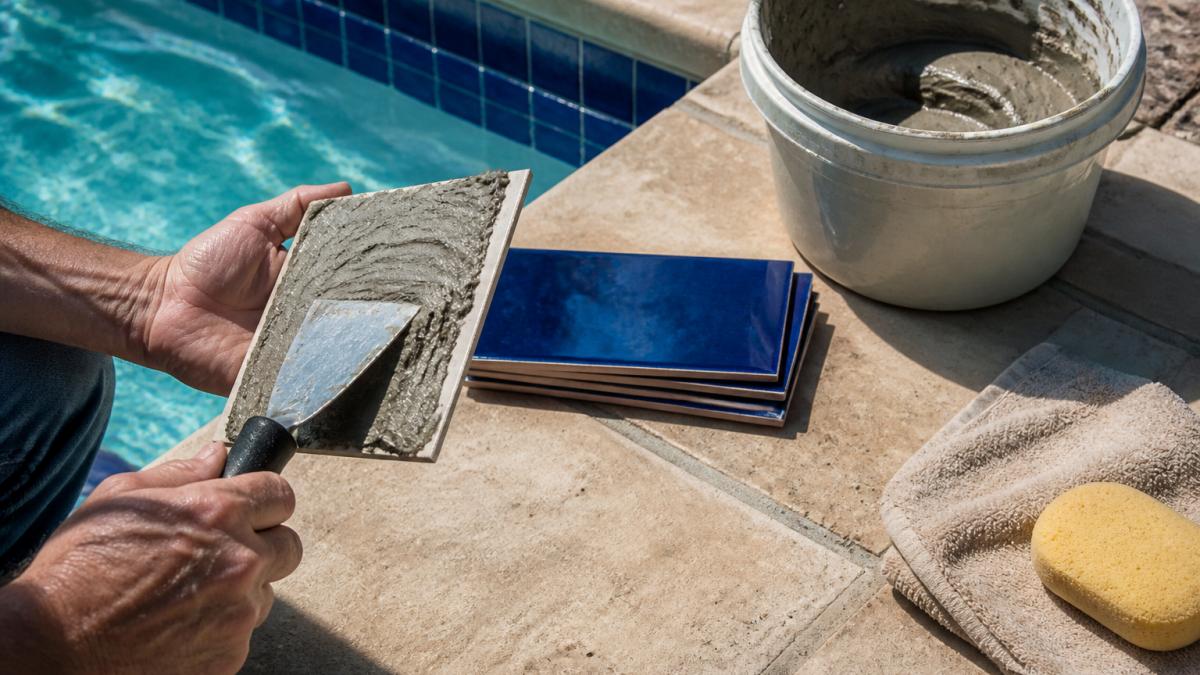
Step-by-Step: Removing Old Thinset and Setting the Replacement Tile
- Lower the water level below the repair area, about 6 to 8 inches.
- Remove the loose tile with a putty knife. Scrape off old thinset and adhesive.
- Clean the substrate with a wire brush. Rinse and let it dry fully.
- Apply pool-rated adhesive to the back of the tile with a notched trowel.
- Press the tile into place. Twist slightly to spread the adhesive.
- Hold or brace it until it grabs. Use tape if needed.
- Let it cure per the product label before grouting.
Expected result: a tile that sits flush with its neighbors and rings solid when tapped.
Pool Tile Grout Repair: Sealing the Grout Line for Good
Grout is your first line of defense against water. When it cracks, water gets behind the tile and the bond fails.
For waterline work, epoxy grout is the strongest choice. It resists chemicals, stains, and water far better than standard cement grout.
Let the grout cure fully before refilling the pool. Most epoxy grouts need 24 to 72 hours. Check the label, because cure time varies by product and temperature.
Choosing the Right Adhesive and Grout for a Lasting Bond
Most guides list product categories without explaining which one actually belongs on your pool. The right choice depends on three things: where the tile sits relative to the waterline, what the tile and substrate are made of, and how long you can keep the pool out of service. Get any of those wrong and the bond fails again.
Match the Product to the Repair Location
- Below the waterline (permanently submerged): Use a pool-rated epoxy adhesive or a thinset explicitly labeled for permanent immersion. Standard cement-based thinset will soften and lose bond when constantly wet.
- At the waterline (wet-dry cycling): This is the harshest zone. Epoxy adhesive and epoxy grout handle the constant wet-dry swing better than cement products. If you use thinset here, it must be a pool-rated, modified thinset, not the unmodified bag from a big-box shelf.
- Above the waterline (splash zone only): Pool-rated thinset is fine, and cement grout is acceptable because it is not sitting in water.
Compatibility With Tile and Substrate
- Ceramic and porcelain tile: Both epoxy and pool-rated thinset bond well. Porcelain is denser and less porous, so use a modified thinset or epoxy designed for low-absorption tile.
- Glass tile: Requires a white, non-staining adhesive, usually a specific glass-tile thinset or epoxy, because gray thinset shows through and darkens the color.
- Natural stone (travertine, slate, quartzite): Use an epoxy or stone-safe adhesive. Cement-based products can bleed into the stone and cause staining or efflorescence.
Cure Time and Immersion Suitability
Cure time is not a formality, it determines when the pool can be refilled. As a general pattern:
- Epoxy adhesive: Often 24 hours before grouting and 3 to 7 days before full immersion, depending on water and air temperature.
- Pool-rated thinset: Typically 24 to 48 hours before grouting, with full cure in about 7 days.
- Epoxy grout: Usually 24 to 72 hours before refilling; cooler temperatures push that toward the long end.
Always read the specific product data sheet. Cure windows shift with temperature, humidity, and joint thickness.
| Product | Best For | Immersion Suitability | Typical Cure Before Refill |
|---|---|---|---|
| Pool-rated modified thinset | Waterline tile, above-water tile | Waterline and splash zone | 24-48 hrs to grout, ~7 days full |
| Epoxy adhesive | Underwater and waterline repairs | Permanent immersion | 24 hrs to grout, 3-7 days to refill |
| Epoxy grout | Waterline and submerged grout joints | Permanent immersion | 24-72 hrs |
| Cement grout | Above-waterline only | Not for constant immersion | 24-72 hrs, but not for submerged use |
Buy your replacement tile before you remove the old one. Waterline tile styles get discontinued, and a close match now beats a mismatched tile later. While you are at the supplier, confirm the adhesive and grout are rated for the exact zone you are repairing, not just “pool use” in general.
Pool Tile Replacement: When a Small Repair Is Not Enough
A small repair works when one or two tiles are loose. Full pool tile replacement is the better call when damage is widespread.
Signs you need full replacement:
- More than 20% of the waterline is loose or missing
- Cracks run through the substrate, not just the tile
- Grout lines are failing across the whole waterline
- The tile is outdated and you want a new look
Full replacement means removing all waterline tile, grinding the substrate clean, and setting new tile with fresh adhesive and grout. It’s more work, but it resets the clock on the whole waterline.
Cost to Replace Pool Tiles and When to Call a Professional
The cost to replace pool tiles depends on the linear feet of waterline, the tile you choose, whether the substrate needs repair, and whether you do the work yourself. There is no single number, but there are realistic ranges you can use to plan.
Realistic Cost Ranges
- DIY single-tile repair: Usually under $50 in materials, a replacement tile, a small tub of pool-rated adhesive, and a tube of epoxy grout. The main cost is your time and the cure wait.
- DIY partial waterline repair (a few tiles): Often $50-$150 in materials, assuming the substrate is sound and you already own basic tools.
- Professional partial repair: Commonly priced by the job or by linear foot. A small repair may carry a minimum service charge, so expect a few hundred dollars even for a modest area.
- Full waterline tile replacement: This is where costs climb. Labor, tile, adhesive, grout, and disposal all factor in. Most homeowners find full replacement runs into the thousands, with the exact figure driven by pool perimeter and tile selection.
These are planning ranges, not quotes. Get at least two written estimates for any job beyond a single tile.
DIY vs. Professional: Decision Criteria
Do it yourself when:
- One or two tiles are loose or missing.
- The substrate behind them is solid and dry.
- You can lower the water level safely and keep the area dry through cure.
- You are comfortable with the adhesive and grout products and their cure windows.
Hire a professional when:
- More than about 20% of the waterline is loose, cracked, or missing.
- Cracks run through the substrate, not just the tile or grout.
- You see soft, crumbling, or hollow-sounding shell material.
- Water is getting behind the tile from deck drainage or plumbing leaks.
Why the Threshold Matters
A small repair resets the clock on one tile. A full replacement resets it on the whole waterline. If you keep patching a failing waterline, you pay for labor and materials repeatedly and never fix the underlying cause. The break-even point is usually somewhere around the 20% mark, past that, full replacement is often the better long-term value.
If the substrate is cracked or soft, do not tile over it. New tile on a failing shell will pop off again. Fix the structure first, then tile.
At Deck-O-Art, we have handled pool and patio work since 1998, and we are BBB-accredited and fully insured. We survey the site before we quote, so you know what you are getting.
Cure Times, Return-to-Service, and Preventing Future Tile Damage
Cure time is the waiting period before the adhesive and grout reach full strength. Rushing it is how good repairs fail.
- Adhesive: 24 hours minimum before grouting
- Grout: 24 to 72 hours before refilling
- Full cure: up to 7 days for maximum strength
Keep the repaired area dry during cure. Don’t refill the pool early, and don’t scrub the new grout.
To prevent future damage, keep your water balanced, reseal grout as needed, and fix small cracks before they spread. Good drainage around the pool deck also keeps water from sitting against the shell.
Conclusion: Getting the Best Results from Your Pool Tile Repair
Loose, cracked, or missing pool tiles are a warning sign, not just a cosmetic problem. Fix the cause, pick the right adhesive and grout, and let everything cure before you refill.
If the damage is widespread or you’d rather not take it on, Deck-O-Art can help.
Contact Deck-O-Art to get a survey and a clear plan for your pool tile repair.
Frequently Asked Questions
What is the best product to reattach pool tiles?
For underwater or waterline repairs, use a pool-rated epoxy or waterproof adhesive designed for submerged applications. Standard thinset will not bond properly under water. Look for products labeled for pool use that cure underwater and resist chlorine and salt. For dry repairs, a modified thinset rated for pools works well. Always match the adhesive to whether the area will be wet or dry during the repair.
Can I replace damaged pool tiles without draining the pool?
Yes, you can replace tiles at or above the waterline without draining the pool. Lower the water level just below the repair area, which exposes the substrate and lets you work dry. For tiles fully underwater, use an underwater epoxy putty that cures while submerged. Draining is only necessary for large-scale pool tile replacement or when the substrate itself needs repair.
What causes swimming pool tiles to fall off?
The most common cause is bond failure between the tile and the substrate, often from water getting behind the tile through cracked grout or a failed expansion joint. Other causes include poor surface preparation during the original installation, using non-pool-rated adhesive, ground movement, and freeze-thaw cycles. Addressing the underlying cause, not just reattaching the tile, prevents repeat failures.
When should you call a professional to repair pool tiles?
Call a professional when tiles are falling off in large sections, when the substrate behind the tiles is soft or crumbling, or when you see widespread cracking along the waterline. These signs point to a deeper structural or waterproofing issue that a simple reattach will not fix. A professional can assess the cause, repair the substrate, and ensure the new tile setting holds up long term.